How to Raise a Dispute in Your CIBIL Report?

Your CIBIL report is more than just a document; it is the definitive narrative of your financial life. Every loan you have ever taken, every credit card bill you have diligently paid, and every financial commitment you have honored is meticulously recorded within its digital pages. This report transcends being a mere statement of accounts; it is your financial reputation quantified into a three-digit score. It becomes the primary reference point, the first impression, when you apply for a new home loan, a car loan, or even a simple credit card. In this context, its absolute accuracy is not just important—it is paramount.
Discovering an error within it can feel like a profound betrayal of your financial diligence. It could be a payment marked late that you know was processed on time, a mysterious loan account you do not recognize, or your own name glaringly misspelled. This moment, often accompanied by a spike of anxiety, is where many consumers feel powerless. However, the Indian credit ecosystem is built with rectification in mind. The system fully acknowledges that errors can and do occur in the complex data flow between lenders and credit bureaus.
Consequently, it provides a structured, consumer-friendly pathway for correction. Raising a dispute is not an admission of fault or failure; it is an exercise of your fundamental right to an accurate financial identity. This comprehensive guide will walk you through the entire process in profound detail, demystifying each click and field, and providing you with the knowledge to navigate the CIBIL dispute resolution mechanism with confidence and effectiveness.
The Foundational Pillar: Meticulous Preparation
The journey to a correct credit report begins not at the login screen, but at your desk. Acting in haste can lead to an incomplete or unclear dispute, prolonging the resolution. Therefore, your first and most critical step is preparation. This phase transforms you from a concerned individual into a prepared claimant, ready to present a clear, undeniable case.
Begin by downloading your latest CIBIL report from the official TransUnion CIBIL website. Do not rely on older copies and it must be less than 60 days old to perform this proccess. Once you have the document, engage in a forensic review. Print it out if possible, and go through every single section with a highlighter. Your scrutiny should cover:
-
The Account Section: Examine each loan and credit card listing. Is the ‘Current Balance’ accurate? Does the ‘Amount Overdue’ column show a figure you have already paid? Is the ‘Credit Facility Status’ correctly listed as ‘Blank’, ‘Written-off’, or ‘Settled’? An account you closed in full should not reflect as ‘Settled’, as this implies you negotiated a partial payout. Most critically, scan your ‘Payment History’—the long string of numbers, zeros, and letters. This is your payment track record. A ‘000’ indicates a timely payment, while other codes signify delays. Ensure every month aligns with your bank records.
-
Personal Information: Verify your name, date of birth, and gender. A single letter’s discrepancy in your name can sometimes cause fragmentation in your credit history. Scrutinize your identification details, primarily your PAN number. An incorrect PAN is a serious issue that can link someone else’s credit activity to your profile.
-
Contact Information: Look at all addresses and telephone numbers listed. Often, old addresses from a decade ago remain, cluttering your report. While seemingly benign, outdated information can sometimes be used for verification in fraud attempts.
As you identify discrepancies, circle them. Now, initiate the second part of preparation: evidence gathering. For account-related errors, your evidence is key. Gather bank statements for the last 36 months that show the transaction contradicting the error. If a loan is reported as open but you have a Closure Certificate or No Objection Certificate (NOC), have it scanned and ready. For personal information disputes, keep your PAN card, Aadhaar card, and voter card within reach. You will need to enter accurate details from these sources. This preparatory dossier is your shield and sword; it equips you with the facts needed to challenge the inaccuracy.
Accessing the Gateway: The CIBIL Dispute Center
With your preparation complete, you now move to the digital arena. Log into your CIBIL dashboard using your secure login credentials. Once inside the member area, navigate to the CIBIL Report option just below the Overview at the sidebar. Your task is to find the portal’s entry point. Scroll down patiently, past all your account summaries and score analysis, to the very bottom of this report page. Here, in the footer, often in smaller text, you will find the crucial link: ‘Raise a Dispute’. Clicking this link is your passage to the dedicated dispute platform—the CIBIL Dispute Center.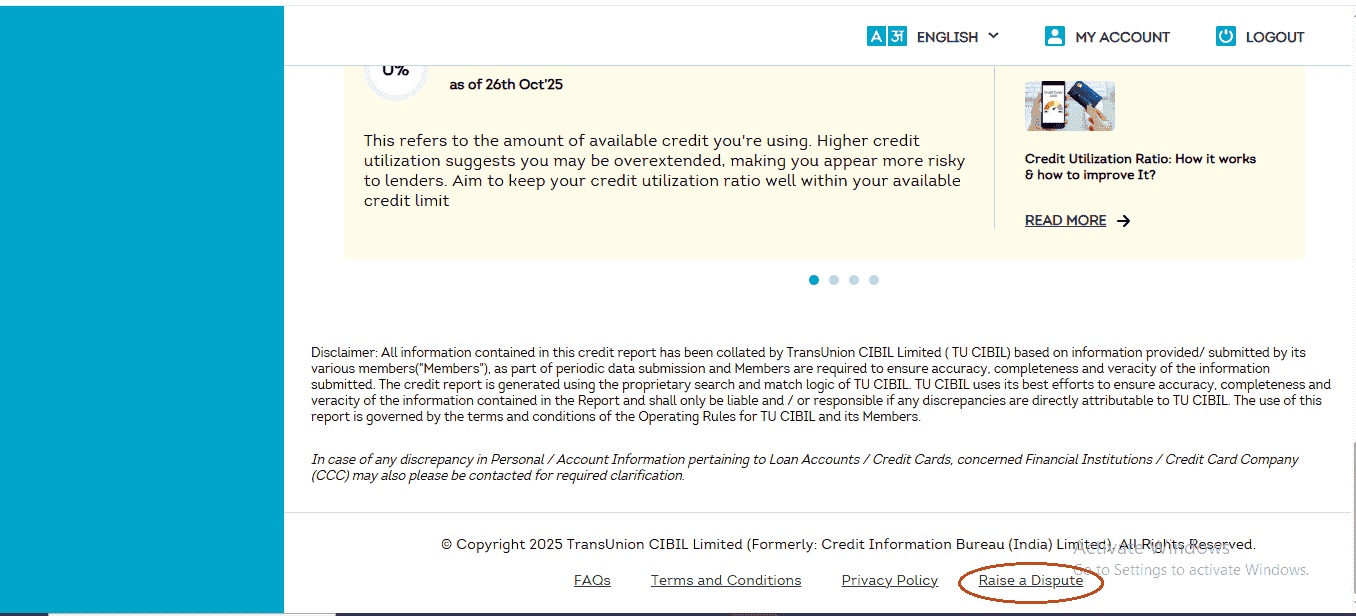
This Dispute Center is a centralized hub designed to triage your issue efficiently. Upon arrival, you are presented with a clear, organized menu of categories. This is your first decision point. The categories are: Account Section, Personal Information, Employment Information,Credit Application History, Contact Information, and Other Information. Your choice must precisely match the nature of your error, as it determines the specific data form you will interact with. For the vast majority of consumers, disputes revolve around Account, Personal, or Contact Information. While the philosophical backbone of the process—identify, correct, submit—remains consistent, the interface and fields you will encounter adapt intelligently to the type of data being corrected.
A Deep Dive: Correcting Account Information
Let us assume the error lies in a loan or credit card detail. You select ‘Account Section’. The system, anticipating common issues, will present you with several descriptive options in a user-friendly format. These are prompts like “Recent payment in loan account not reflecting in my CIBIL report.” Your task here is not to find the exact poetic match but to use this as a gateway. Click the ‘Find Solution’ button adjacent to a broadly relevant prompt. This action leads you to an informational page. Scroll down on this page, and you will encounter the decisive ‘Raise A Dispute’ button. Click it to unlock the core dispute form.
This form is the heart of the account correction process. It will present a list of all your credit accounts—everything from your first credit card to your latest auto loan. The interface is designed for clarity. To work on a specific account, you must click the expand icon (usually a small arrow) located beside it. This action reveals the account’s detailed data fields, laid out in a structured manner.
Now, you are in control. The form offers two primary paths:
1. Instant Resolution for Clear-Cut Issues: If the problem is unambiguous—such as a duplicate account entry or an account you are certain you never opened—the form provides checkboxes for these exact scenarios: ‘Account reflects multiple times’ and ‘Account does not belong to me’. Selecting the appropriate box is often sufficient.
2. Precise Editing for Specific Errors: For more nuanced inaccuracies, you have the power of direct editing. You can click directly into data fields to correct them.
-
Correcting Core Details: Under the ‘ACCOUNT DETAILS’ tab, you can amend fields like ‘Current Balance’, ‘Amount Overdue’, and ‘Date Closed’ by simply typing the accurate value.
-
The Critical ‘Status’ Field: Perhaps the most vital field is ‘Credit Facility Status’. If a loan you repaid in full is incorrectly reported as ‘Settled’ or ‘Written-off’, you must manually change this. The correct action is not to leave it blank, but to select the option that says ‘Clear Existing Status’. This instructs the bureau to remove the damaging status tag pending verification.
-
Amending Payment History: Navigate to the ‘PAYMENT STATUS’ tab, adjacent to ‘ACCOUNT DETAILS’. Here, your complete payment history is displayed, often month-by-month for the entire loan tenure. If the report shows a delay (e.g., ‘STS’ code for 90 days overdue) for a month you paid on time, you can click on that specific month’s status and change it to the correct code, such as ‘000’ for a timely payment.
-
Addressing Written-Off Amounts: If relevant, a third tab, ‘OTHER INFORMATION’, may contain fields for ‘Written-off Amount (Principal)’. These can also be edited if they contain errors.
After meticulously making all necessary adjustments for that account, you click the ‘Continue’ button at the bottom. Importantly, the system allows you to repeat this process for multiple accounts within the same dispute session before final submission.
Streamlining Identity: Updating Personal and Contact Details
The process for Personal Information is refreshingly direct, reflecting the nature of the data. After selecting this category and proceeding through the ‘Find Solution’ gateway, you will arrive at a form that displays your demographic details as they exist on your credit file. You will see your name, date of birth, gender, and listed identification documents (like PAN and Voter ID). The system’s requirement here is not for explanation but for precision. If you see a misspelling—’Rahul’ spelled as ‘Raul’—or an incorrect digit in your PAN, you simply click on the erroneous field. An editable text box will appear. Your task is to type the accurate information, character-for-character, exactly as it appears on your official government-issued document. Once corrected, you proceed.
For Contact Information, the form serves as a historical log of every address and phone number lenders have ever reported for you. It is common to see past addresses spanning many years. To correct this, you edit each entry. You can update an old address to your current one, modify a pin code, or, crucially, you can ensure outdated and irrelevant addresses are corrected or rendered accurate to avoid confusion. Similarly, you can update telephone numbers and email addresses. This step is vital not only for pure report accuracy but also to ensure you receive all physical and digital communications from lenders and the bureau itself.
The Final Mandatory Step: RBI’s Directive for Account Verification
After you have reviewed all your changes on the summary page and clicked ‘Proceed to next step’, you will encounter a page that is non-negotiable: ‘Update Your Account Information’. This is not a CIBIL-specific formality but a directive from the Reserve Bank of India (RBI). Introduced to strengthen consumer protection, this step links your dispute identity to a verified financial account. Its primary purpose is to establish a secure channel for you to receive any monetary compensation or settlement that might be awarded to you by a lender or through a legal process in the future. It underscores the formal, rights-based nature of the dispute process.
You must fill this form with immense care. The fields include: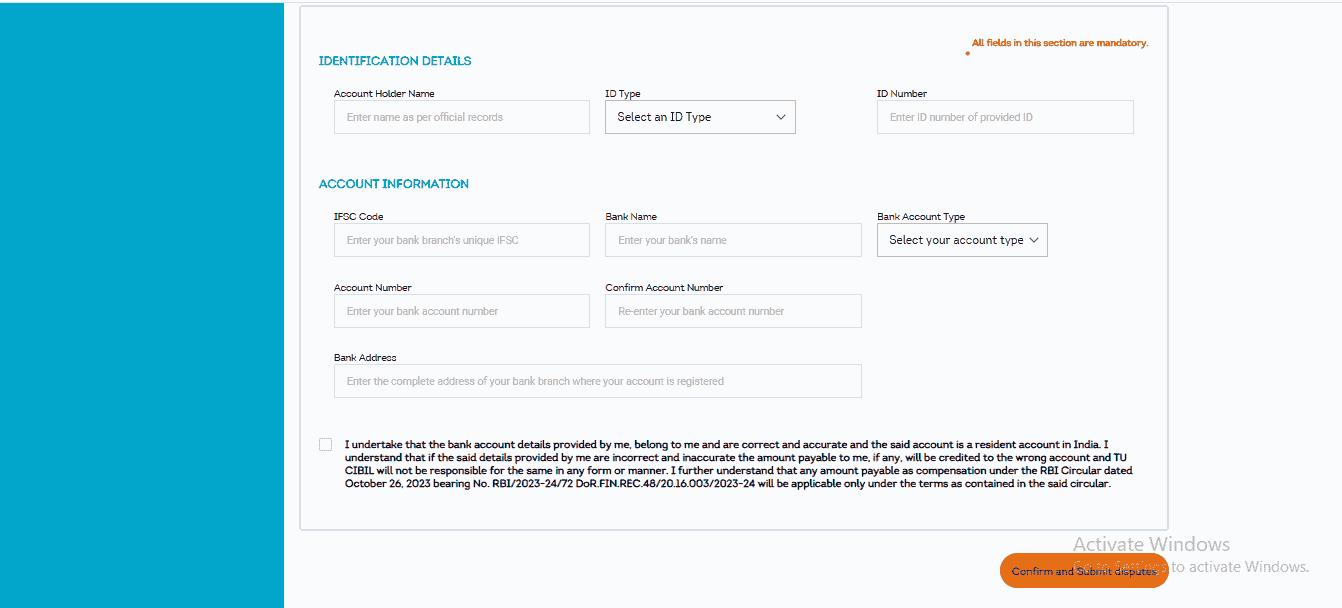
-
IDENTIFICATION DETAILS: Your name (as per bank records), ID type (Aadhaar, PAN, etc.), and the corresponding ID number.
-
ACCOUNT INFORMATION: Your bank’s IFSC Code, bank name, account type (Savings/Current), your Account Number, and the bank branch address.
The accuracy of your bank account number and IFSC code is paramount. Double-check these entries. Once satisfied, you click the final button: ‘Confirm and Submit Disputes’. Your dispute is now officially filed and enters the regulatory resolution pipeline.
The Submission and The Vigilant Wait: Navigating the Aftermath
Upon successful submission, the system will generate and display a unique Dispute ID. This alphanumeric code (e.g., CDS12345678910) is your single most important reference. Treat it like a precious receipt. Save a screenshot, note it down in a secure place—this is your ticket for all future tracking. This ID confirms your dispute has been logged and timestamped.
Now, the process moves into its operational phase. CIBIL will forward the substance of your dispute to the concerned bank or financial institution—the entity that originally furnished the data. This institution is legally bound under the CICRA regulations to investigate your claim and report back to CIBIL with its findings within 30 calendar days. The possible outcomes are clearly defined:
-
Correction: If the bank’s investigation verifies your claim, it will send an electronic data update to CIBIL with the corrected information. CIBIL will then update your credit report accordingly. You will receive a notification.
-
Verification: If the bank concludes, after checking its records, that the reported information is accurate, it will communicate this to CIBIL. The data will remain unchanged on your report. The bank should provide a reason for its conclusion.
Your role during this period is one of vigilant monitoring. Use your Dispute ID within the ‘Dispute Status’ section of your CIBIL dashboard to check for updates. Do not assume silence means approval. When you receive a resolution notification, proactively download a fresh copy of your CIBIL report. Do not just check your score; examine the specific section you disputed to confirm the change has been physically implemented on your report.
Should the outcome be unsatisfactory—for instance, the bank verifies data you still believe is incorrect—your journey is not over. You retain the right to escalate. Your next step is to approach the grievance redressal officer of the bank directly, presenting your documented evidence. The final arbiter, if the bank remains unyielding, is the RBI Ombudsman, a powerful consumer recourse mechanism.
In conclusion, your CIBIL report is a living, breathing document that requires stewardship. Engaging with it, reviewing it with a critical eye at least annually, and courageously correcting its errors is a non-negotiable aspect of modern financial wellness. The dispute process is your sovereign tool for ensuring fidelity in your financial narrative. By approaching it with thorough preparation, surgical precision, and patient vigilance, you do far more than just rectify a number on a screen. You ensure that when a lender looks at your report, they see not just data, but an accurate reflection of your responsibility, thereby paving the way for the trust, the credit, and the future you have diligently earned.
0 Comments
No comments yet. Be the first to share your thoughts!